It’s natural for parents to worry about their child’s ability to safely and comfortably insert and remove contact lenses. Fortunately, research shows that with a little instruction and a proper routine, children can safely insert and remove their contacts independently. Children wearing contact lenses feel better about their appearance, and better about participating in physical activity.1 With our step-by-step guide on how to put in contacts for beginners, your child will be wearing contacts—with confidence—in no time.
Why contacts? A great option for your child’s nearsightedness
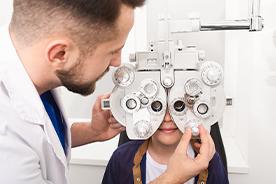
CooperVision’s MiSight® 1 day contact lenses, were designed specifically for myopia (nearsightedness) control in age-appropriate children.* Participants in a three-year MiSight® study, some as young as 8 years old, overwhelmingly reported insertion/removal success. In fact, 90% of the children indicated that they could insert and remove the lenses on their own.2† When asked how easy or difficult it was to insert their lenses, 57% reported that lens insertion was easy by the end of week one. That number continued to climb all the way to 85% by the end of the first month.3 Results like these provide a clear indication that most children are quick learners when it comes to lens insertion and removal.
How to put in contacts for beginners
Step 1: Take a deep breath.
Remember, you can do this! If you get stuck, remember you can always ask for help. (Parents: remind your child, if you also wear contacts, that you’ve been doing this almost every day for a very long time, for extra reassurance.)
Step 2: Remember, always wash your hands first.
Washing your hands with an oil and scent-free soap can help keep germs and residue from getting on your lenses and help keep them free from smudges or feeling oily.
Step 3: Start with the same eye every time.
Just like lenses in your glasses, your left and right contact lenses are usually a different power to give you the best possible vision correction for each eye. Always start with the same lens every time so you don’t accidentally switch them.
Tip: If you’re right-handed, start with the right lens. If you’re left-handed, go lefty first.
Step 4: Get the lens onto your fingertip.
Use your fingertip to scoop the lens out or dump onto the palm of your hand. Put the lens on the end of your finger and hold it up to the light so you can see it clearly. Is it curved upward like a bowl? Then you’re almost there! Check it for any tears so you’re sure it’ll be comfortable when it goes on your eye.
Step 5: Insert the lens.
Use your free hand to hold up your upper eyelid just under your eyelashes. Use the middle finger of the hand holding your lens to pull your lower eyelid down just on top of your eyelashes. Holding the lens on the tip of your index finger, gently roll or place it on your eye. Once inserted, slowly look from side-to-side to let the lens naturally center over the colored part of the eye. Make sure the lens is comfortably seated on your eye. Take a second to blink and make sure the lens doesn't pop out.
Step 6: Now blink and you’re done!
You did it! Blink naturally a few more times and look in the mirror. If everything looks and feels OK, they can enjoy their glasses-free, clear vision and go about their day! (Parents: celebrate your child’s success with them!)
How to remove contacts for beginners
Step 1: Take a deep breath
Just like you got them in, you’ll get them out. You’ve got this!
Step 2: Wash and dry your hands first, especially your fingertips.
Step 3: Stand in front of a well-lit mirror.
Step 4: Using your non-dominant hand, raise your upper eyelid away from your eye with any finger except your thumb.
Step 5: With your dominant hand, use your middle finger to pull your lower eyelid down.
Step 6: With the tips of your index finger and thumb, gently position them on the outer parts of the contact lens. Then slide the lens down a bit before squeezing at the edges to remove it from your eye.
Step 7: You’re done! You are wearing contacts for the first time! If you’re wearing MiSight® 1 day*, you can discard them in the garbage as soon as you them out of their eyes since they’re single-use contacts. Not sure what kind of contacts you’re prescribed? Ask your parent or trusted adult to help you read the package.
How you can help your child: Common challenges with inserting and removing contacts
Of course, all kids are different, and some may need more assistance than others. If you’re a parent who wears contacts, sharing your experience may be helpful and comforting to your child. You can try putting your contacts in at the same time, when your child first gets started. If you’re not a contact lens wearer, being involved in the learning process, at least initially, is a great way to provide encouragement.
Just in case your child needs a little extra help, these tips can make removing their contact lenses easier:
- If their lens is difficult to remove, make sure your fingers are dry. This helps grip the lens a bit better.
- Sliding the lens toward the white of their eye and/or toward their lower eyelid can make it easier to remove. The lens and the colored part of the eye are the same shape, which helps the lens stay in place. Moving the lens toward the white of the eye can help separate it from their eye for easier removal.
- New lenses take some time to get used to. Don’t rush. Encourage them to take their time when first removing new lenses.
- If the edges of their lens stick together, add a drop of fresh saline solution from the package and have them gently peel the edges apart.
You can always ask your prescribing eye care professional and their staff if they have any other tips and tricks.
The benefits of contacts outweigh the challenges
Daily disposable technologies have helped make contact lenses kid-friendly4 in ways never before imagined. And with the eye health benefits of a treatment like MiSight® 1 day 5‡, parents have added incentive to realize the benefits of contact lenses against traditional prescription eyeglasses.
Additional resources for beginners
Helpful videos like the ones found on our MiSight® YouTube channel can be used to lessen any apprehension your age-appropriate child may be feeling. Getting detailed, step-by-step tips from their peers can instill kids with confidence and shorten the learning curve.
These tips, including some for contact lens hygiene, will help your child continue to build confidence as they put in their own contacts—with your support and assistance when needed.
Download our quick and easy guide to putting in your contact lenses, with important dos and don’ts, here.
If you want to find a MiSight® certified eye care professional and learn about free trials and rebates offered, click the links here.